How to Sell Video Course Online With BlurBay
We’ll go through the simple process of uploading a video to BlurBay and how to get it ready for sales.
With BlurBay, you can sell video course online content.
But the question is obvious – How?
In other words, not only how do you upload a video onto BlurBay – setting the stage for profit in the first place – but how do you apply the unique blurring feature that defines our platform? These are crucial questions because the answers impact how you make money from your videos and how your potential buyers find your course content.
So, we’re going to give you the answers here – from uploading your video to applying the various settings that give you control over how it makes money.
Before You Start
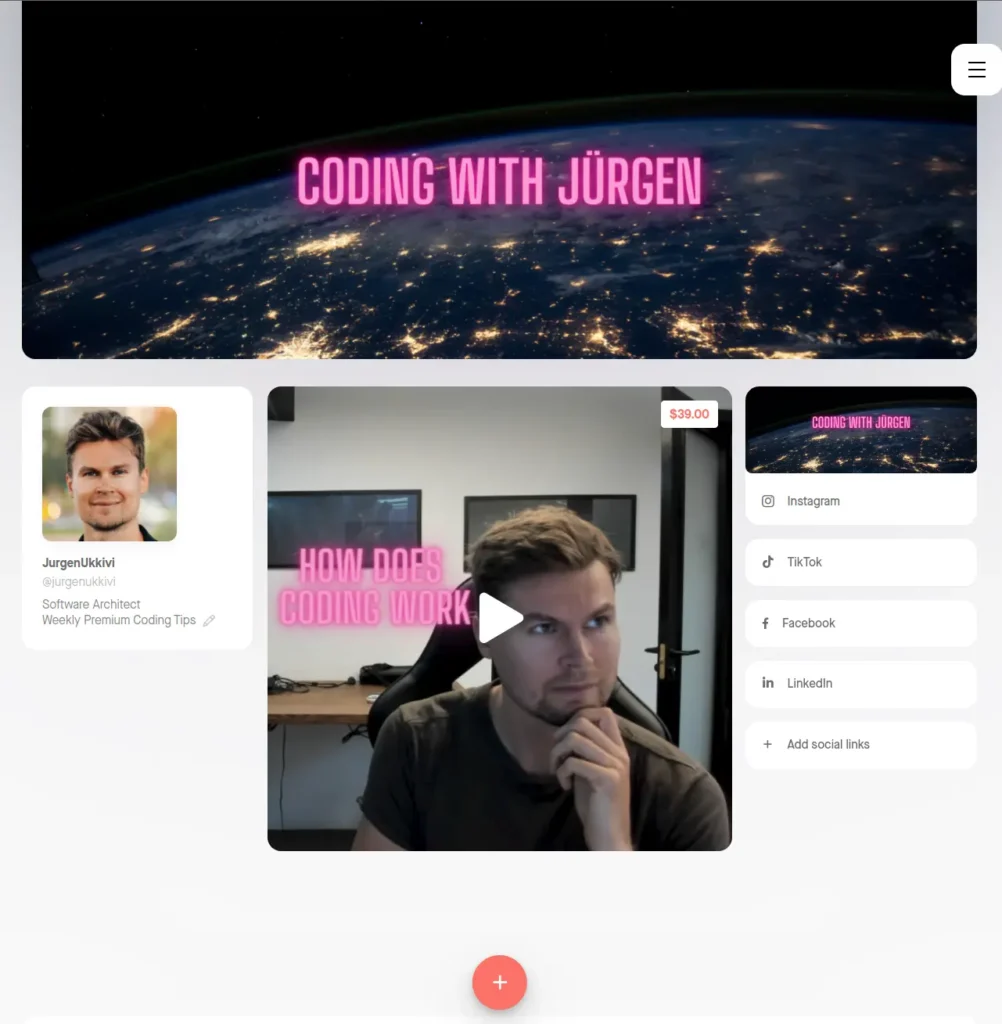
The best way to start selling content on BlurBay is to set up your profile by adding a profile pic, background pic, some links, and a description. Why? Put yourself in a buyer’s shoes. You’ve stumbled across a course or lesson that sounds right up your alley, but you’re not the sort who just clicks the “Buy” button without thinking. You want to do a little research, with your first port of call being to find out about the person who made the video.
So, where do you head?
The uploader’s profile screen. And if you land on that screen to see no picture or description of the uploader, you’re going to think two things. One – I can’t trust this person because I have no idea who they are. And two – if this is the effort they put into their profile, then I can expect the same level of low effort from their tutorials and courses.
For that reason, setting up a profile is a must in our opinion.
However, you can start selling content even without customizing anything if you just want to get your first video up and running without messing around with anything else.
In this example, a simple profile has already been created and we can start a walkthrough of uploading and selling a video on BlurBay.
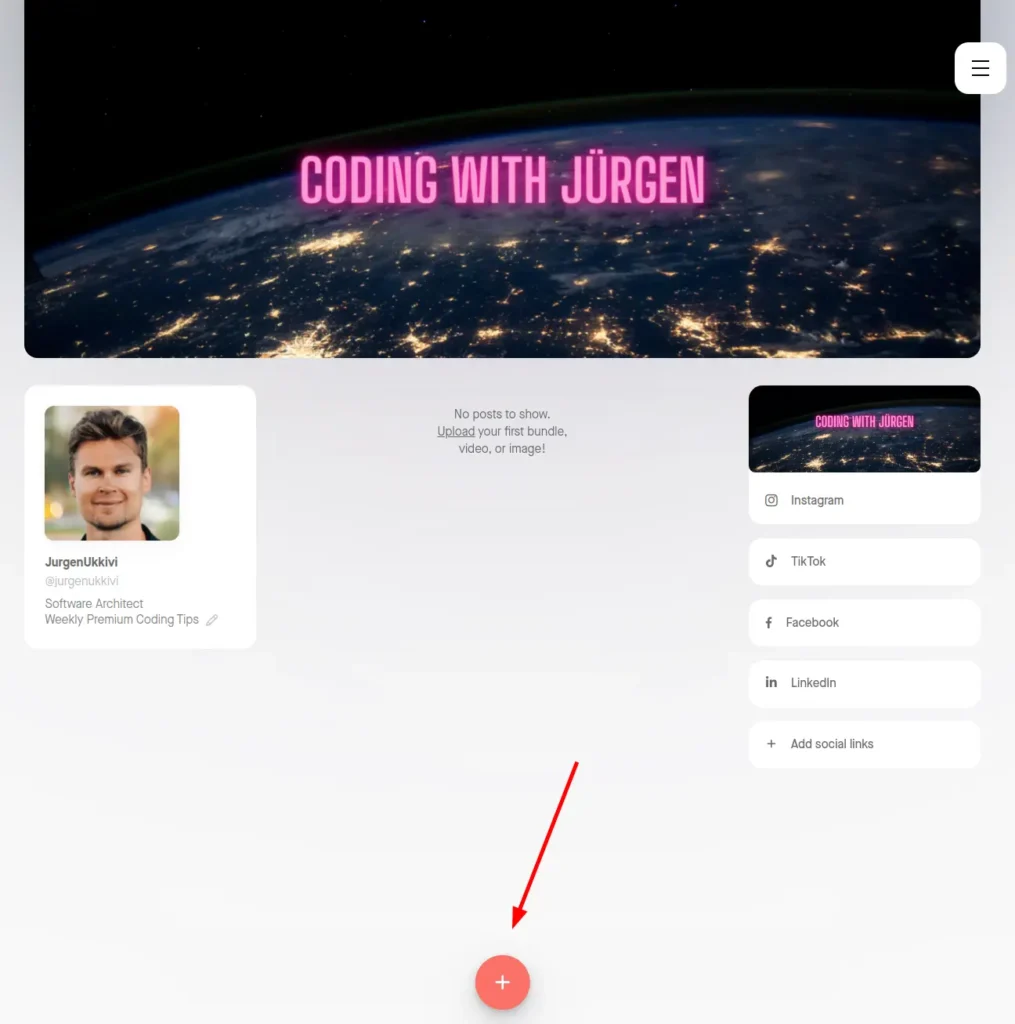
Step 1 – Start Upload
Start by clicking the Plus button at the bottom or select it from the Menu – Upload Content.
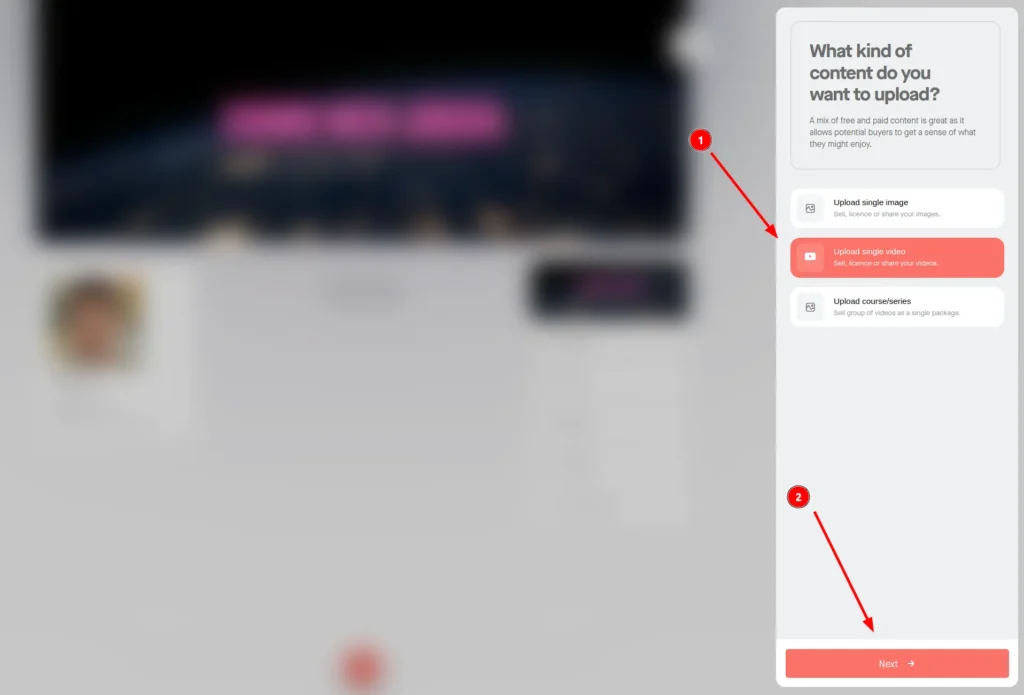
Step 2 – Select Upload Type
You will be prompted which type of upload you would like to do. For this guide, you’re going to be uploading a video, but take note of the other options – you may be able to use them later as you build more complex courses.
- Select Upload Single video
- Click Next
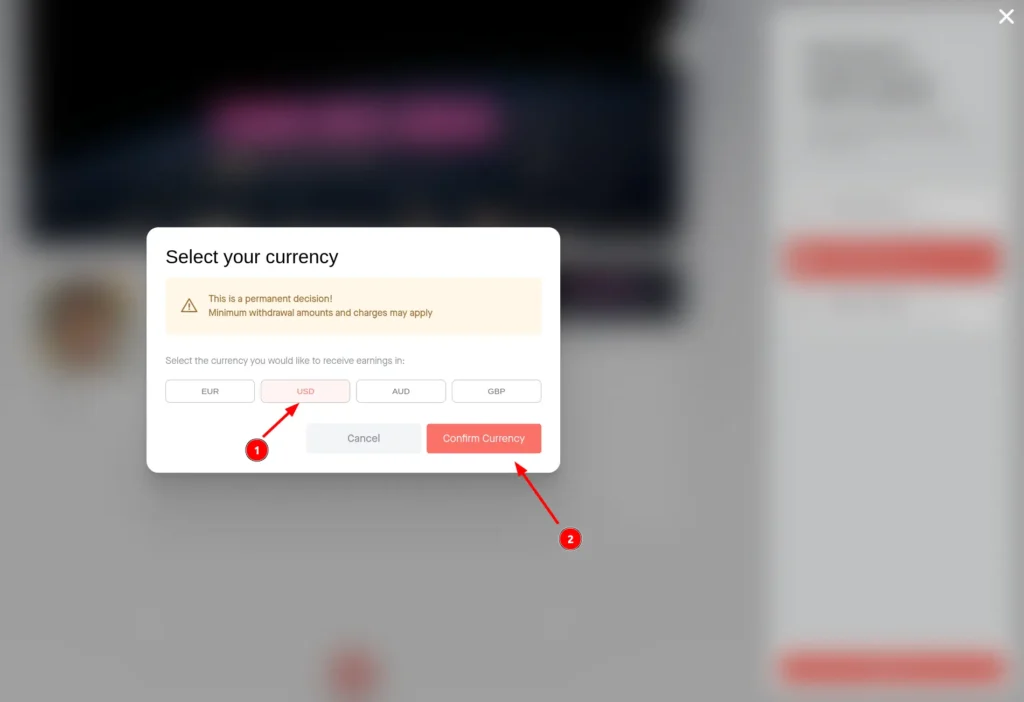
Step 3 – Select Sales Currency
When you haven’t chosen the currency you would like to sell in, you are asked about it. Available options are EUR, USD, AUD, and GBP. Once selected all your content is sold in that currency. Make note of that fact – it could affect you if you want to branch out and sell your content internationally, as most BlurBay creators do. We recommend choosing USD simply because it’s a more universal currency with which all users will be familiar. And don’t worry – any currency conversions will be handled at the point of purchase so you don’t have to do anything there.
In this example, we’ll select USD.
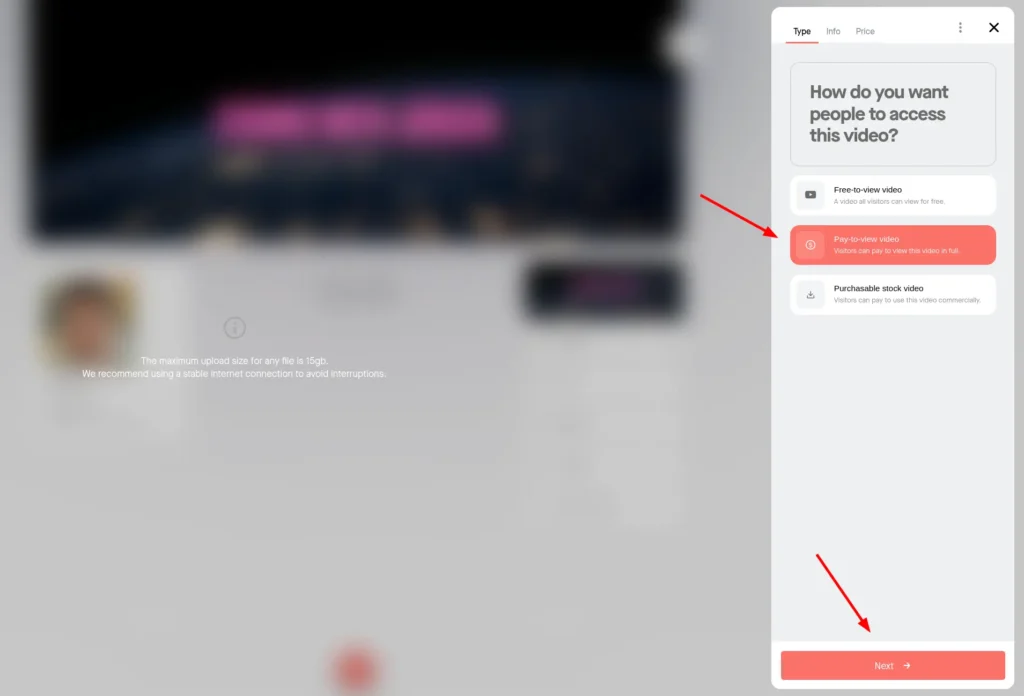
Step 4 – Select Video Sales Type
You can now select how you’d like the content to be accessed:
Free-to-View
Video can be viewed from start to end by everyone without having to pay. Of course, this means you won’t be able to monetize the video directly. But if that’s the case, why would this option be useful if you want to sell video courses?
We’ve seen several ways to use free videos.
For instance, a lot of course creators use their free videos to provide potential buyers with an intro to themselves and their content. They’re basically putting a face to their lessons before the buyer has to commit – vital for raising trust and helping a buyer see if they gel with the video creator.
We’ve also seen a lot of our creators use free videos to upsell into full courses.
The idea there is that you create a video that digs a little into a topic, without going so far down that you cover everything. For instance, a piano teacher might create a video showing viewers how to play a simple scale. That vid could go top to bottom on the scale – keys, practice routines, and everything – before rounding out with a CTA:
“This is just one of dozens of scales. If you want to see (and learn) the rest, I have other videos available that will get you playing like a pro in no time.”
Give a little value. Promise more in future videos. And – crucially – profit from the extra value offered once you’ve established you know what you’re doing.
Pay-to-View
In order to view the full video, users will need to make a payment.
This is the “bread and butter” of the BlurBay model. It allows you to charge users for viewing your course content, rather than providing it on platforms that force you to rely on ad-supported revenue.
This pay-to-view model also creates prestige and authority around your video.
Buyers tend to have a low opinion of a product’s value if they get it for free. So, when you’re selling video tutorials online, you want to make it clear from the off that these tutorials are actually worth something. A price tag makes that happen.
Think about it:
How much stock do you put into the videos you see on YouTube? Sure, you may pull plenty of valuable info from those videos, but they feel disposable because you’re getting them for free. Psychologically, you’ll place more value into a video you pay for – and be more likely to really pay attention – than you would a video you got for free. The same goes for your potential buyers.
Purchasable Stock
Video can be viewed from start to end by everyone, but users can pay to download the video and use it for commercial purposes. This option is suitable for stock video creators.
This is one of the less common options – especially for new course creators – but can become super valuable once you start building a brand around your courses. And, as mentioned, stock video creators can use this option to sell directly to brands that need standardized videos, rather than creating content that actually teaches anything.
Seeing as you’re selling a single video go with the Pay-to-view option for this guide.
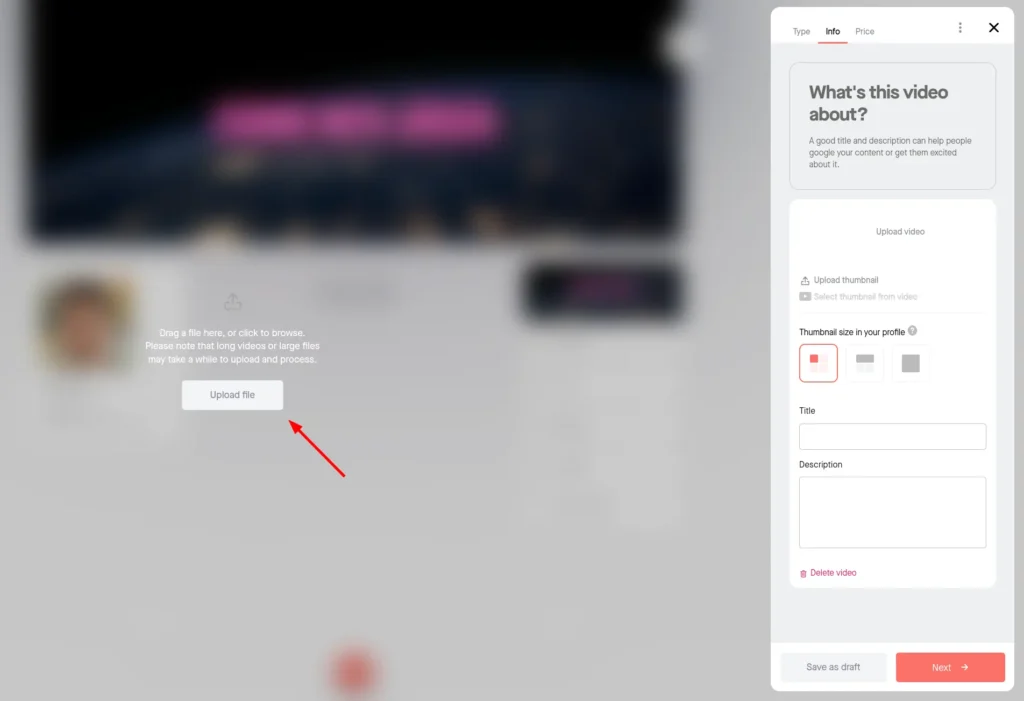
Step 5 – Uploading a Video
You can now start to upload your video. If you are using a video editor tool, then we recommend exporting a mp4 file using codec h.264 for best results. However, other common video formats work as well. The maximum file size limit is 15GB, so you should be able to upload any video you’d like.
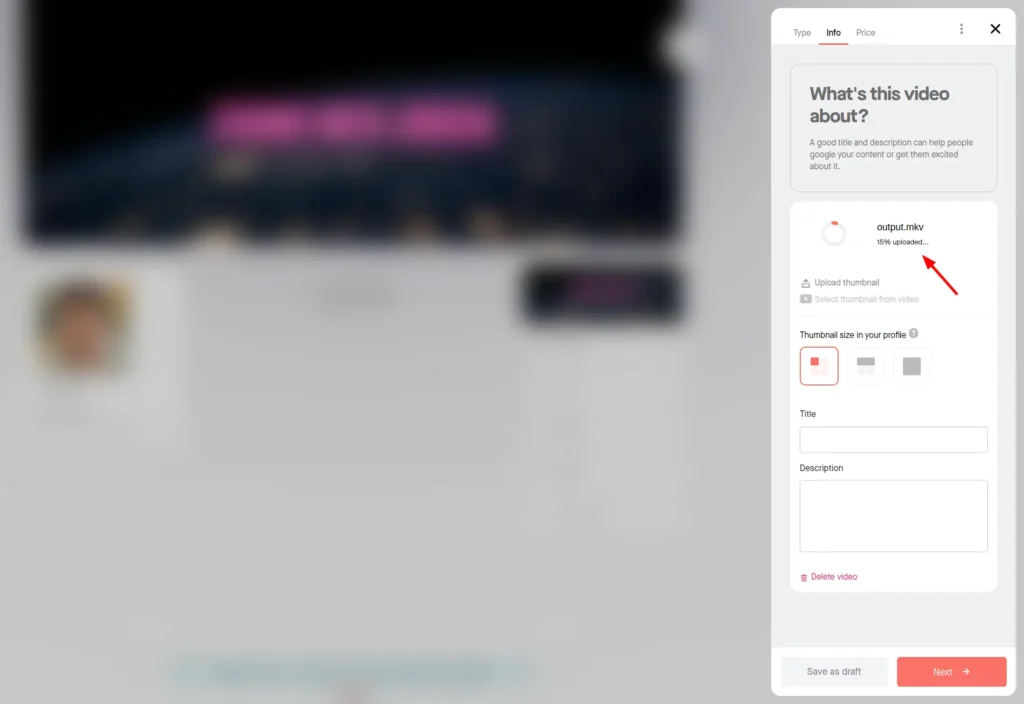
Step 6 – Uploading and Processing
Once the file is selected it will go through uploading phase 0-100%. Be sure to not close the browser during upload and that you have a steady internet connection – any break in connection could force you to start the whole process again. Once uploading is done, then processing will start and you’ll see a gauge running from 0-100%.
Once the gauge hits 100% – voila! The file is ready to be viewed by you.
Step 7 – Customizing the Video
Here’s where the fun starts, as you can move on to customizing your video for your audience once you’ve uploaded the content.
Best of all, most of these features are available as the video uploads and processes – you can set them as you wait so you’re not dealing with dead time.
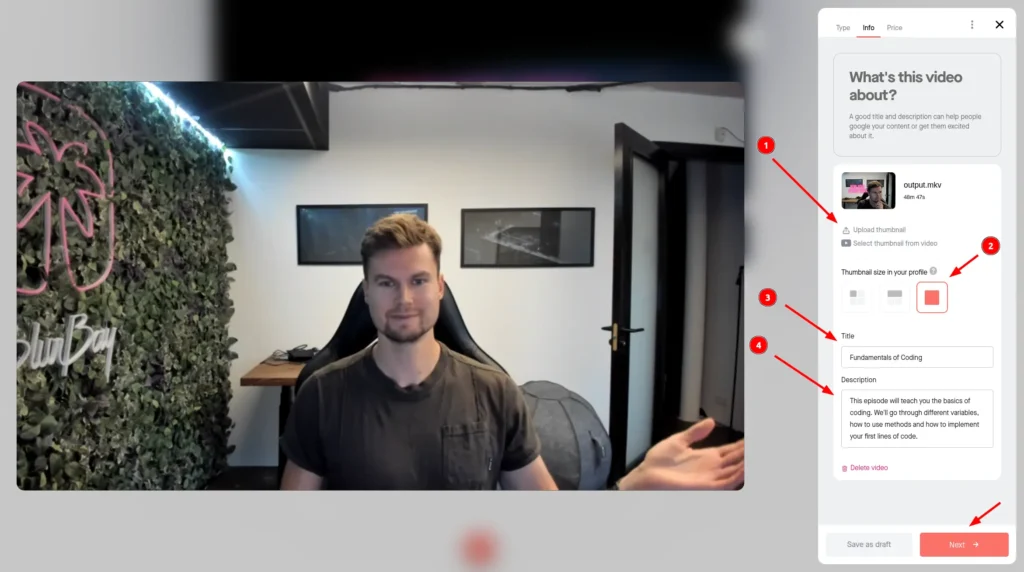
Customization Options
Set a thumbnail
You can either upload a thumbnail or select a thumbnail from the video. Selecting the thumbnail from the video can only be done once processing is complete. When uploading is done and you haven’t selected a thumbnail, a thumbnail is added automatically from the middle of the video – though you can replace the auto-generated thumbnail at any time.
We recommend spending a little time editing an attractive thumbnail together. It’s going to be your key to getting clicks onto the video because it – along with your video’s title – is the first thing a possible buyer is going to see. If you need proof of how important your thumbnail is, we can look at YouTube:
An enormous 90% of the best-performing videos on that platform have customized thumbnails.
The reason being, a custom thumbnail shows you’ve put some effort into the video’s presentation before the buyer ever commits their cash. It’s another point in the professionalism column to go along with your BlurBay profile.
Select thumbnail size
This selection will affect how the video thumbnail will appear on your profile. It can either be a small block in 2 blocks side-by-side view, a wide block, or a large one. We’ll select a large block for this demo, but any will do depending on the type of thumbnail you want to create.
Set a title
Set a title of your choice. The max length is 100 letters.
This is a pretty strict limit, so you need to get choosy with how you use your words here. After all, you’ll do better when you sell video courses if your buyers know what they’re getting from the title alone.
Short. Snappy. Descriptive.
Keep those three words in mind and you’ll land on a title that gets people to click.
Set a description
Set a description of your choice – max length is 1,000 letters.
Think of the description as a chance to do some of the heavy lifting for the title you created earlier. Where the latter creates intrigue – while communicating the basics of what your video offers – the former is all about digging into a little detail. Consider sharing a lesson plan or structure here, as we find that clarity can give people who are on the fence a little extra incentive to buy.
You can now move to the next part.
Step 8 – Blurring and Pricing Your Video
This is where BlurBay gets its name. A part of the video is free to view for everyone and the other part can be viewed once the amount is paid. Before that, it has our titular blur effect placed over it, allowing you to use the initial portion of the video as a teaser before encouraging a viewer to pay for the rest.
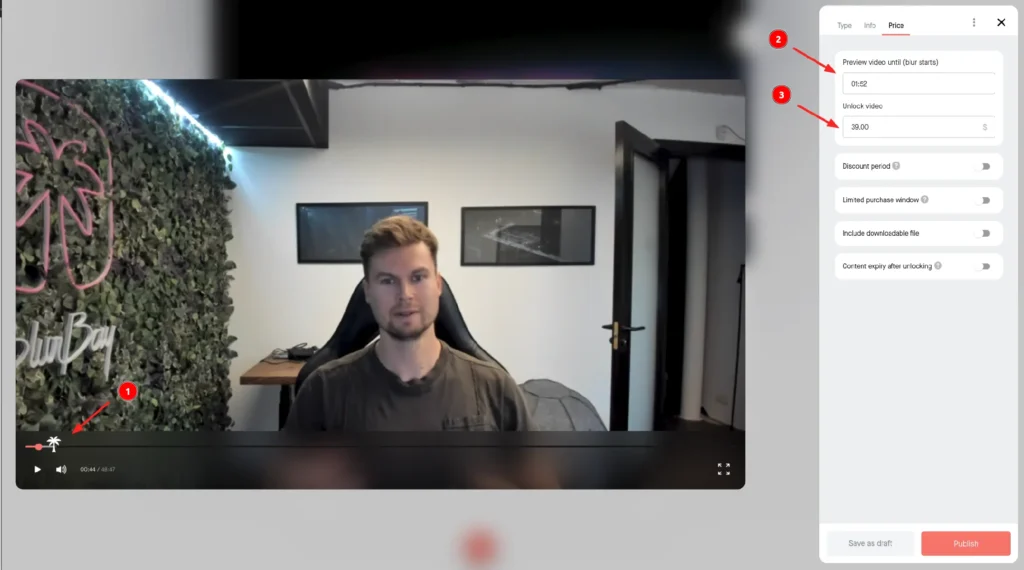
The best part is that you have full control over where the blur goes with these steps:
1) You can drag around the Palm tree icon to where you want the paywall to appear. We suggest creating a good teaser in the free part and leaving a cliffhanger right before the paywall. This has been known to increase sales conversion by 2-3x compared to other traditional websites.
2) If you don’t want to drag the Palm tree icon and want to type in a specific time in the video, then you can just type it in here. Filling it in will put the Palm tree icon to that exact part in the video – no dragging required. We recommend doing this if you know the exact timestamp for your cliffhanger CTA.
3) Decide on a price for the video. The minimum price is 1.00 USD, EUR, AUD, or GBP. In this example, we set the price to 39.00 USD.
Step 9 – Including Extra Materials With the Purchase (Optional)
If you’d like your users to get a file with some extra info with the purchases, then you have the option to toggle Include downloadable file.
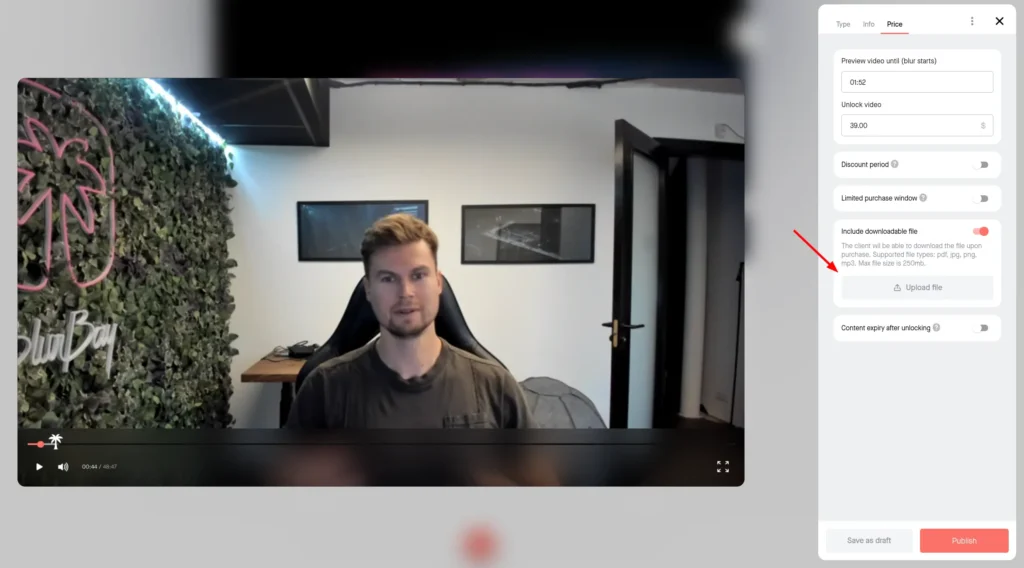
Possible file types are pdf, mp3, jpg, and png. So, you can include a voice file if that works best. Maybe an infographic on an image or a pdf with a summary. Think of this as a place to slot any supplemental materials for your video. We mentioned piano instructors who sell video course online earlier – their downloadable materials could be annotated sheet music!
Step 10 – Content Expiry After Unlocking (Optional)
Another option is to expire your content after a number of days or on a certain date. You’re creating FOMO here – the buyer has to get it now or it’s going to be gone in the future. This psychological sales strategy has been used for as long as the concept of “sales” has existed, and it’s as effective today as it’s always been.
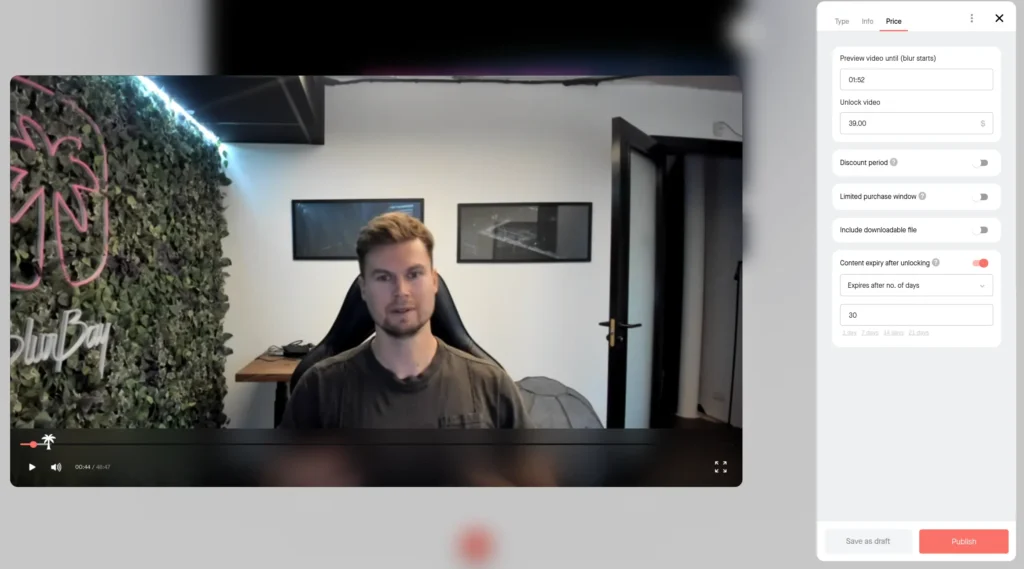
You have a few options here:
After a no. of days – You might want to allow just 30 days of access after a purchase or for just a few days. This can be used to urge your audience to consume the material before the time is up.
Once the days pass, the video can be no longer viewed but can be bought again and it will be possible to view for the same number of days again once bought.
Expires at a certain date – You set a certain date when the buyers no longer have access to the video. For example, you could set a date of 30th of November and the current year. Maybe you want to create a video on a similar topic and want people to no longer have access to this one. Or, the video contains relevant information up until a certain date, after which it becomes useless. If the expiry date arrives, then the video can no longer be viewed or bought again.
Discount period and Limited purchase window are covered in a different post here.
Step 11 – Publishing the Video
Publish the video by clicking Finish and the video is out and ready to share with the world.
You’re done! You can now share and promote the link to your profile or the video directly on your social media platforms and start earning. By the way, we absolutely recommend getting social with your video – marketing is key to driving engagement and if you don’t have it, you’re relying solely on people discovering the video on BlurBay alone.
Ready to Sell Video Course Online?
If so, you have everything you need in these steps to make selling video tutorials online using BlurBay as simple as pie. And remember – you can always edit the various conditions you’ve applied to your video at any time.

Jürgen is a tech entrepreneur with over 15 years of experience in the industry. Jürgen is passionate about tech, media, entertainment and enjoys helping readers by providing up to date blogs in his areas of expertise.


